|
|
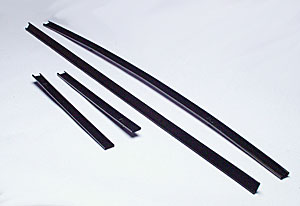
Sunroof Track InstallationThe following instructions will help remove and replace your rusted or damaged sunroof tracks with our new units, part #50156s.
Please keep in mind that these are merely suggestions for installation and there maybe other methods that will work just as well. The Fiero Store is only responsible for the parts that it ships. The Fiero Store is not responsible for any expenses incurred as a result of inspection or installation of any part. Please seek the help of a professional automotive technician if you feel that this may not be the job for you.
 1. Remove the sunroof glass.2. Pull the original sunroof weatherstrip out. It is usually only held in place with weatherstrip adhesive and should pull out fairly easily.3. Remove the headliner.4. Remove the 6 10mm bolts that go up through the steel roof and into the sunroof tracks.5. Looking down at the tracks from the outside of the car, you will see several rivets holding the tracks in place. Remove these rivets by grinding the heads off of them or drilling them out. If you choose to drill them out, be very careful not to drill too far since they do not extend all the way through the steel roof. 1. Remove the sunroof glass.2. Pull the original sunroof weatherstrip out. It is usually only held in place with weatherstrip adhesive and should pull out fairly easily.3. Remove the headliner.4. Remove the 6 10mm bolts that go up through the steel roof and into the sunroof tracks.5. Looking down at the tracks from the outside of the car, you will see several rivets holding the tracks in place. Remove these rivets by grinding the heads off of them or drilling them out. If you choose to drill them out, be very careful not to drill too far since they do not extend all the way through the steel roof.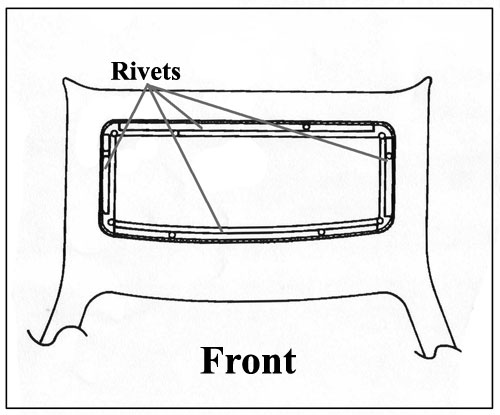 6. The tracks can now be removed. We have come across some tracks that are stuck in place with an adhesive and some that are not. If your tracks feel like they are “stuck” in place, a heat gun will help.7. Vacuum any rust and debris out of the roof channel and the drain holes located in each corner of the weatherstrip channel. Thoroughly clean the channel with mineral spirits or an equivalent. If your car does not have these drain holes in each corner, click on the Sunroof Water Leak Bulletin from the Tech Page Menu before proceeding to Step 8.8. Fill the existing rivet holes with silicone since they will not be used. Mark each hole location on the painted roof section with an erasable marker or pieces of masking tape. These marks will be useful for Step 12.The following step is not necessary but it makes the installation process a little easier, especially if you are doing it without a helper.
9. Apply double-sided tape to the underside of each new track. We use 3M brand tape that is ½” wide and .030” thick. Any brand will work as long as it is ½” wide and not too thick since it is only used to hold the tracks in place while completing the following steps.10. Place each track in place on the roof.11. Re-install the 6 10mm bolts. Snug each bolt but be careful not to over-tighten, which will bend the tracks.12. Drill 1/8” holes through the tracks and into the roof. Mark your bit so that you only drill down about a ¼”. These holes should not be in the same location as the original rivet holes that were filled with silicone in Step 8. Each new hole should be about 1” away from the old holes.13. The original rivets were a blind type rivet that is not as readily available as a standard rivet. If you have access to these rivets, install them in each new hole.14. If blind rivets are not available, then #8 x 1/4" stainless steel button head screws work perfectly. Do not over-tighten each screw since the tracks will bend and the new holes in the fiberglass roof could strip. You just want each screw to be snug.15. Install the sunroof weatherstrip with a light bead of 3M weatherstrip adhesive (part #51417) down the center of each new track. Do not apply adhesive in the 4 corners because it will plug the water drain holes. 6. The tracks can now be removed. We have come across some tracks that are stuck in place with an adhesive and some that are not. If your tracks feel like they are “stuck” in place, a heat gun will help.7. Vacuum any rust and debris out of the roof channel and the drain holes located in each corner of the weatherstrip channel. Thoroughly clean the channel with mineral spirits or an equivalent. If your car does not have these drain holes in each corner, click on the Sunroof Water Leak Bulletin from the Tech Page Menu before proceeding to Step 8.8. Fill the existing rivet holes with silicone since they will not be used. Mark each hole location on the painted roof section with an erasable marker or pieces of masking tape. These marks will be useful for Step 12.The following step is not necessary but it makes the installation process a little easier, especially if you are doing it without a helper.
9. Apply double-sided tape to the underside of each new track. We use 3M brand tape that is ½” wide and .030” thick. Any brand will work as long as it is ½” wide and not too thick since it is only used to hold the tracks in place while completing the following steps.10. Place each track in place on the roof.11. Re-install the 6 10mm bolts. Snug each bolt but be careful not to over-tighten, which will bend the tracks.12. Drill 1/8” holes through the tracks and into the roof. Mark your bit so that you only drill down about a ¼”. These holes should not be in the same location as the original rivet holes that were filled with silicone in Step 8. Each new hole should be about 1” away from the old holes.13. The original rivets were a blind type rivet that is not as readily available as a standard rivet. If you have access to these rivets, install them in each new hole.14. If blind rivets are not available, then #8 x 1/4" stainless steel button head screws work perfectly. Do not over-tighten each screw since the tracks will bend and the new holes in the fiberglass roof could strip. You just want each screw to be snug.15. Install the sunroof weatherstrip with a light bead of 3M weatherstrip adhesive (part #51417) down the center of each new track. Do not apply adhesive in the 4 corners because it will plug the water drain holes.
|
|
|
|